
Happy Valentine’s day! Today, I’m sharing my strawberry matcha (green tea) macaron recipe. The matcha flavor offsets some of the sweetness of the macaron shells, and when combined with just a hint of strawberry flavor in the filling, these macarons are so perfect. This is definitely my favorite macaron recipe so far. What’s your favorite?
-
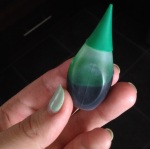
- green food coloring
-

- strawberry icing
-
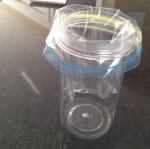
- sandwich bag for piping
-

- sifting
-
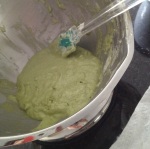
- macaron batter
-
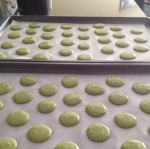
- piped macaron batter
-
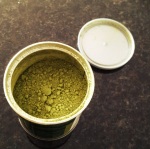
- matcha powder
-

- strawberries
If you’re new to making macarons, please also read my previous post for some tips and tricks.
Here’s what you’ll need to make strawberry matcha macarons:
(This recipes makes about 56 macaron shells; that’s 28 filled macarons)
Macaron shells:
- 1 cup icing sugar
- 3/4 cup ground almonds
- 3 1/2 tbsp granulated sugar
- 2 large egg whites (room temperature)
- 2 tsp matcha powder
- 3 drops green food coloring
Filling:
- 3/4 cup icing sugar
- 2 tbsp unsalted butter (room temperature)
- 1/8 tsp vanilla extract
- 2 1/2 tsp strawberries (roasted and mashed)
Directions:
Macaron shells
- Line two medium baking sheets with parchment paper.
- In a food processor, process ground almonds and icing sugar for about a minute. Scrape along the inside of the food processor in between to ensure that there aren’t any large clumps and that the two ingredients are mixed well. (Special thanks to my friend, Goodies & Kitsch, for generously giving me her food processor. While you’re here, you should go check out her awesome blog.)
- In a medium bowl, sift the almond mixture.
- In a small bowl (be sure to use a bowl that’s not too shallow), whisk the egg whites with a handmixer on medium-low speed for about a minute until light and fluffy.
- Increase the speed to medium-high and continue to whisk the egg whites until medium-stiff for about 2 minutes. (If you turn the bowl upside-down, the egg whites don’t slide out.)
- Gradually add granulated sugar to the egg whites while continuing to whisk on medium-high speed for another 2 minutes.
- Gradually fold the egg mixture into the almond mixture, adding only about 1/3 of the egg mixture at a time.
- Add matcha powder and fold.
- Add green food coloring and fold again. (I use liquid food coloring, but most people recommend gel or powder-based food coloring. You should use whatever you’re comfortable with.)
- Transfer the batter into a piping bag. (Or if you’re frugal like me, you can use a medium sandwich bag instead and just cut a tiny corner of the bag to pipe.)
- Pipe batter onto baking sheets. Try to pipe small rounds that are just under 1 inch wide and at least 1/2 inch apart.
- Preheat oven to 325°F. Let the batter sit at room temperature for about 15 to 20 minutes.
- Turn the oven down to 300°F and put the baking sheets into the oven for 7 minutes.
- Rotate the baking sheets and bake for 8 minutes.
- Remove the baking sheets from the oven and allow the macaron shells to cool.
Filling:
- Preheat oven to 400°F.
- Rinse 2 large or 3 medium strawberries, hulled and cut into halves.
- In a small oven-safe glass pan, bake strawberries for about 10 to 15 minutes.
- Let the strawberries cool before draining the strawberry syrup. (NOTE: You can save and refrigerate the strawberry syrup to use later on pancakes or cheesecake.)
- Mash the strawberries and drain the excess syrup. You only need about 2 1/2 tsp of mashed strawberries.
- In a small bowl, cream the icing sugar and butter. (I use a single whisk attachment on my handmixer and whisk on low speed.)
- Whisk in vanilla extract.
- Whisk in strawberries.
~
Sandwich just a small dab of filling between two macaron shells – you can pipe the filling or just gently spread the filling with a spatula.
Are you tired yet? 🙂 Yes, that was quite a bit of work, but just look at this:

strawberry matcha macaron
Trust me, it tastes just as good as it looks.
Try this recipe and let me know how it goes for you. 🙂
%20french%20macarons)


You must be logged in to post a comment.